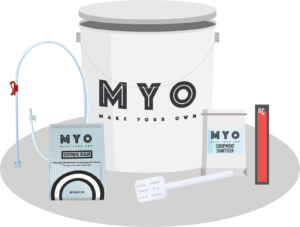
Strawberry & Lime Cider Instructions
GETTING STARTED
KIT INCLUDES:
- Fruit Juice Concentrate Blend
- Strawberry & Lime Cider Flavouring
- Cider Yeast & Nutrient
- Sweetener
YOU WILL ALSO NEED:
- Fermentation Bucket (minimum 30L capacity)
- Thermometer Strip
- Siphon
- MYO Equipment Sanitiser
- Large Mixing Paddle
- 1kg Dextrose Sugar (or granulated sugar)
YOU WILL ALSO NEED:
- Granulated Sugar
- 40 x 500ml Reusable Homebrew Bottles, Swing-top or Crown Cap (plus caps)
PREPARATIONS & MIXING INGREDIENTS
1. Unbox all items from the kit. Note down your kit’s batch number found on the back of the carton, in case you need to contact us about it.
2. Clean and sanitise your Fermentation Bucket, lid and mixing paddle using MYO Equipment Sanitiser following the instructions on the packaging.
3. Pour 1kg dextrose sugar into your bucket. Add 3L boiling water and stir to dissolve.
4. Cut open the Fruit Juice Concentrate Blend pouch and pour contents into the Fermentation Bucket. Rinse the remains of the pouch out with a small amount of warm water. Stir well.
5. Top up to the 23L line marked on the Fermentation Bucket with cold water and stir.
6. Stick the Thermometer Strip to the side of the bucket where indicated. Make sure the area is dry first. Check the temperature is below 30°C.
7. When the temperature is below 30°C, sprinkle the contents of the Cider Yeast & Nutrient sachet onto the surface of the liquid and stir. Do not add the Apple Cider Flavouring or Sweetener sachets yet – keep safe as they will be used later.
8. Fit the lid onto the bucket, ensuring it fits neatly on the rim but DO NOT click the seal all the way around, as CO2gas needs to escape during fermentation.
FERMENTATION
9. Place the bucket on a washable surface (in case of spillage). Ensure it is kept at a constant temperature between 20-25°C for 10 days. Fermentation will take longer below 20°C and the beer quality will be reduced above 25°C.
10. After 7 days of fermentation taste your cider. If it tastes obviously sweet, then fermentation hasn’t finished – replace the lid (as per Step 8) and leave to ferment for a few more days, tasting each day until it does not taste obviously sweet. Only proceed to Step 11 providing the cider does not taste obviously sweet.
If you’re unsure, it’s better to wait until you are sure fermentation is fully complete.
FLAVOURING
11. Once you’re sure that fermentation has finished, scoop 1/2 jugful of cider from the bucket and add the Cider Flavouring and Sweetener into the jug and mix thoroughly. Then slowly and gently add the jug contents back into your bucket stirring slowly to ensure properly mixed but avoid stirring up the sediment at the bottom of the bucket.
12. Leave to re-settle for another 24 hours before continuing.
BOTTLING
13. Bottle your beer using only reusable homebrew beer bottles. Reject any bottles that have the slightest chips, cracks or imperfections.
14. To assemble your siphon, run one end of the clear plastic tubing under a hot tap for 20 seconds, then push it about 1cm over the firm plastic tube. Repeat to the other end of the clear plastic tubing and push in the tap. Insert the sediment trap into the other end of the firm plastic tube. Attach the red clip to the firm plastic tube.
15. Clean and sanitise your bottles, crown caps (if using) and Siphon using MYO Equipment Sanitiser, following the instructions on the packaging.
16. Put half a teaspoon of granulated sugar into each 500ml bottle.
17. Place the firm plastic tube end of the siphon into your beer, with the sediment trap sitting above the sediment. Hold the siphon in place by clipping the red clip onto the rim of the bucket.
18. To siphon the beer from the bucket into the bottles, suck on the tap end of the Siphon to fill the tubing with beer. Then close the tap, place it in your first bottle (which should be at a lower level than your bucket) and open the tap to allow the beer to pour into your bottle. If done correctly, the flow of beer will now be continuous and will only stop each time you close the tap.
19. Fill all bottles, leaving sediment behind in the bucket. Leave 5cm headspace in the bottle and seal with the swing top, or a crown cap using a suitable capper.
SERVING & STORAGE
20. Store your beer upright in a warm place (22-27°C) for 1 week then transfer to a cool, dark place for clearing
21. Your beer is ready to drink as soon as it’s clear and will continue to improve for up to 3 months.
22. Serve chilled and pour slowly ‘in one go’ leaving sediment behind. Enjoy!
To enjoy at its best, open your beer within 3 months of bottling and store in a cool, dark place.